Visual Guide
About 1 minBeginner Course
Visual Guide
These diagrams appear beside the relevant tutorial steps. They are teaching schematics, not Blender / Blockbench screenshots or game renders. Follow the route-specific text for application controls.
Open images at full size and zoom on mobile. All steps retain text instructions; color and images are not the only source of information.
| Diagram and tutorial | What to check | Full size |
|---|---|---|
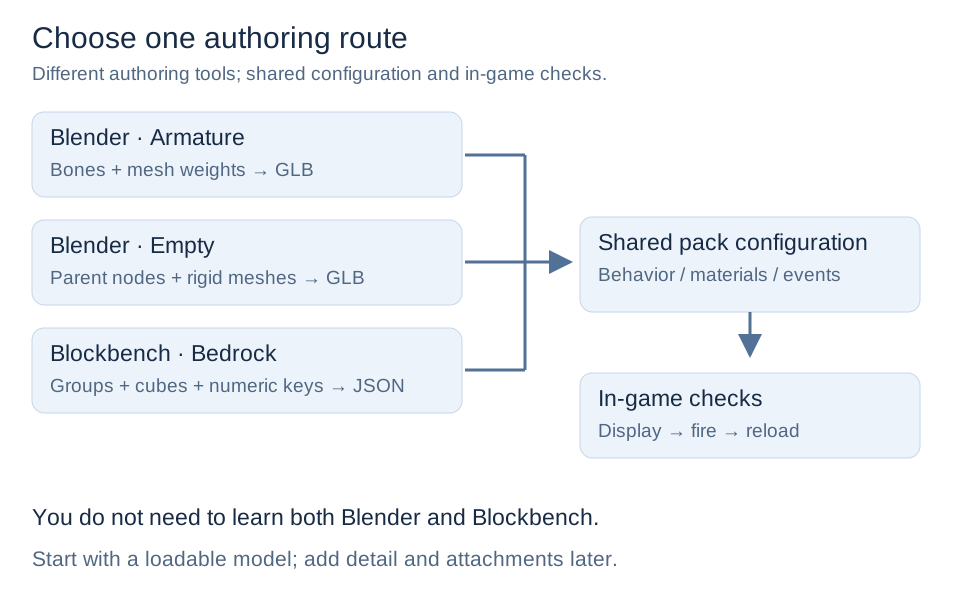
| How the three routes meet | Choose a tool without learning both applications. | Open image |
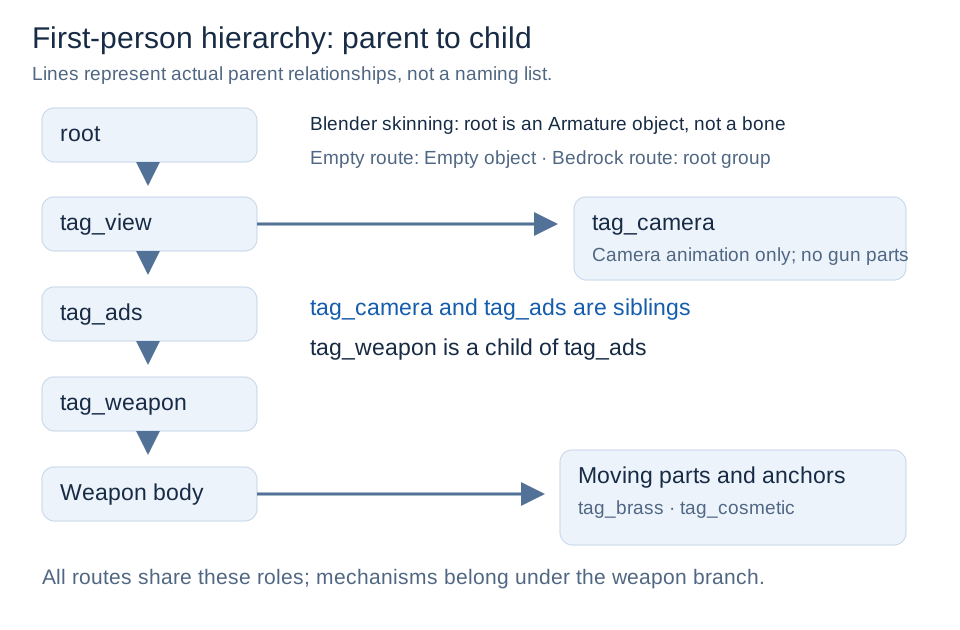
| First-person parent hierarchy | Understand the camera and ADS branches. | Open image |
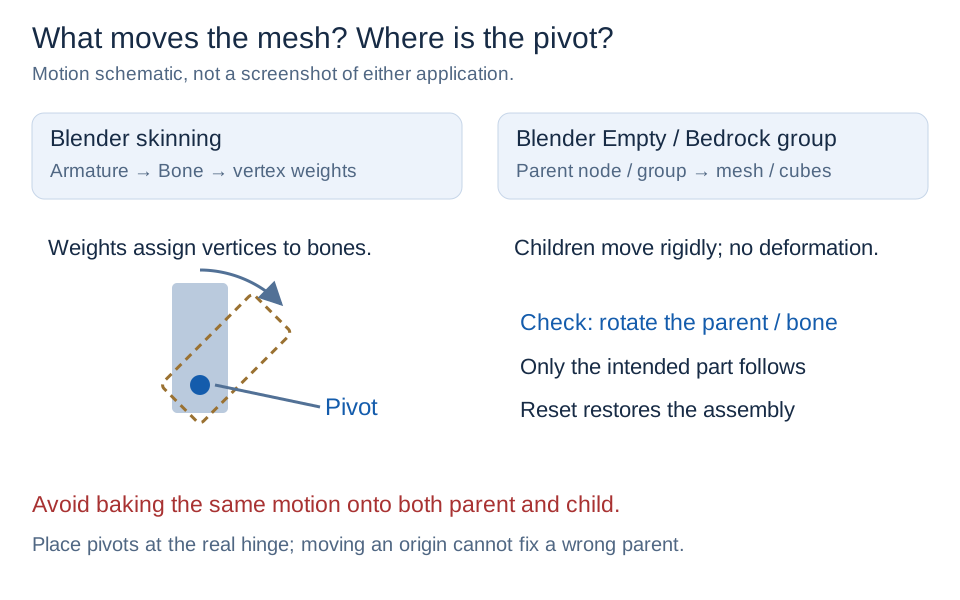
| Weights, parents, and pivots | Identify what drives the mesh. | Open image |
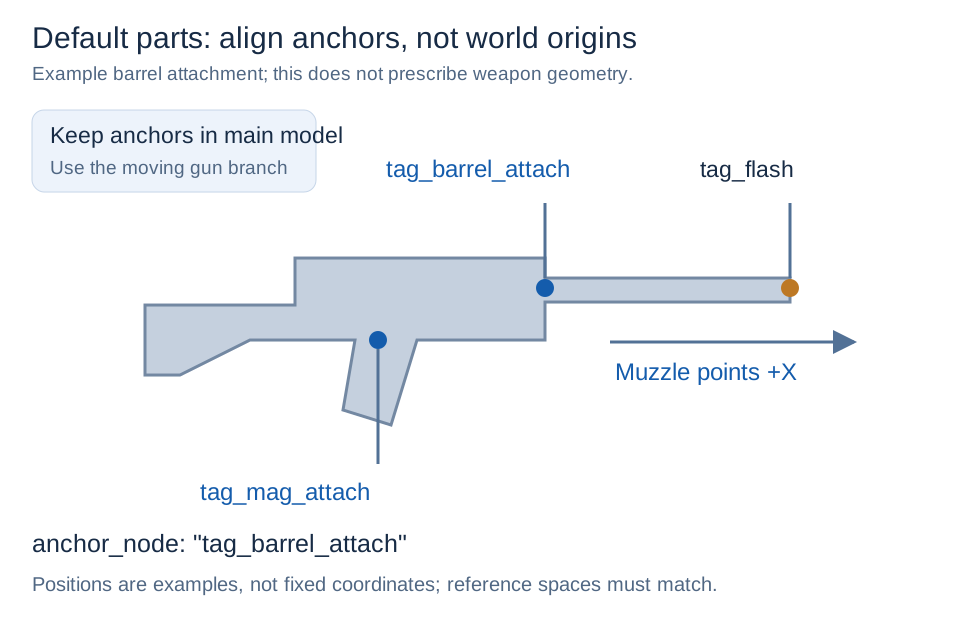
| Default-part anchors | Check anchors and part reference spaces. | Open image |
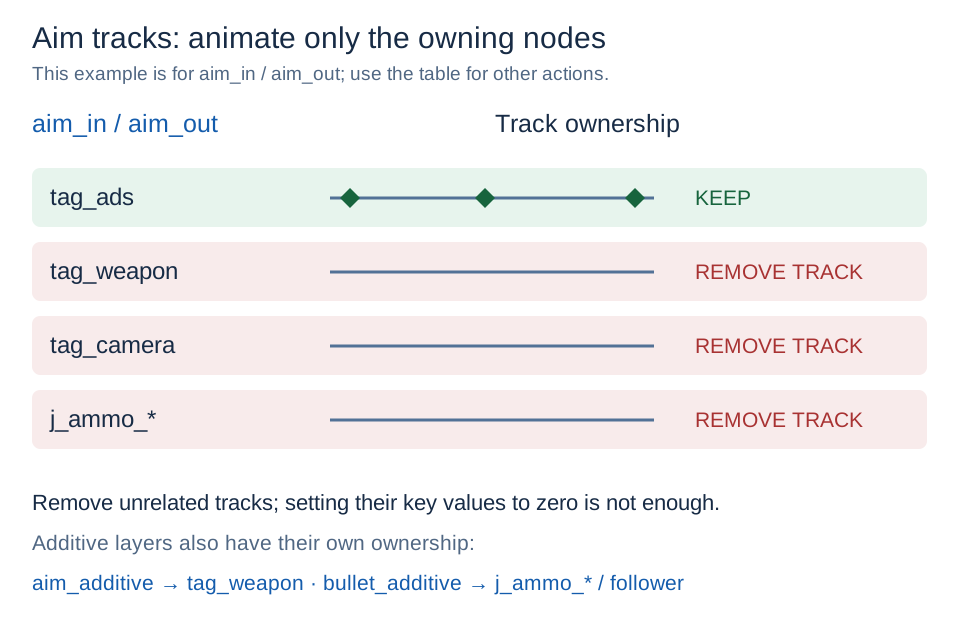
| Animation track ownership | Remove unrelated constant tracks too. | Open image |
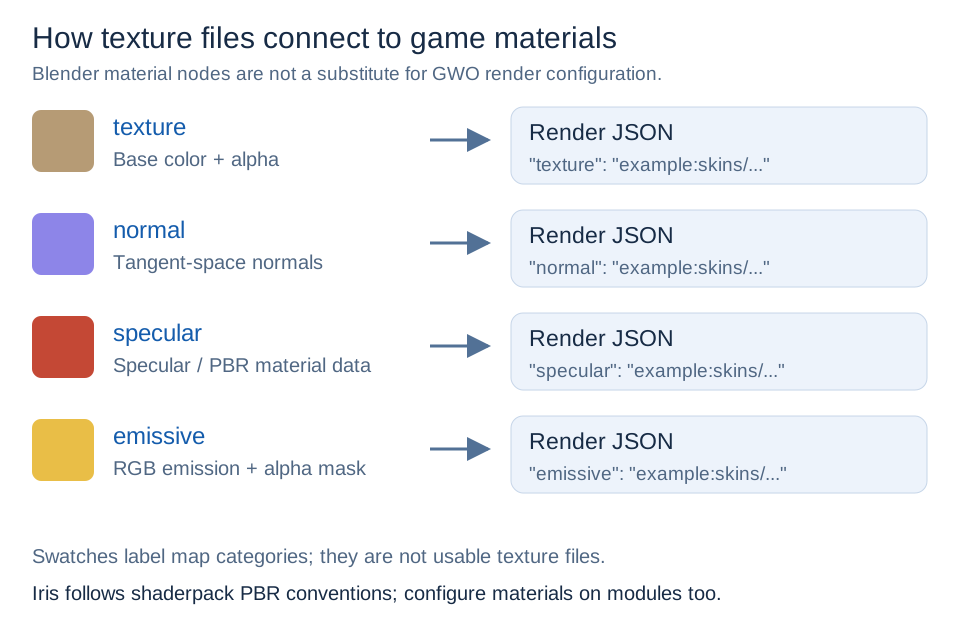
| Texture-to-material mapping | Separate base color, normals, specular, and emission. | Open image |
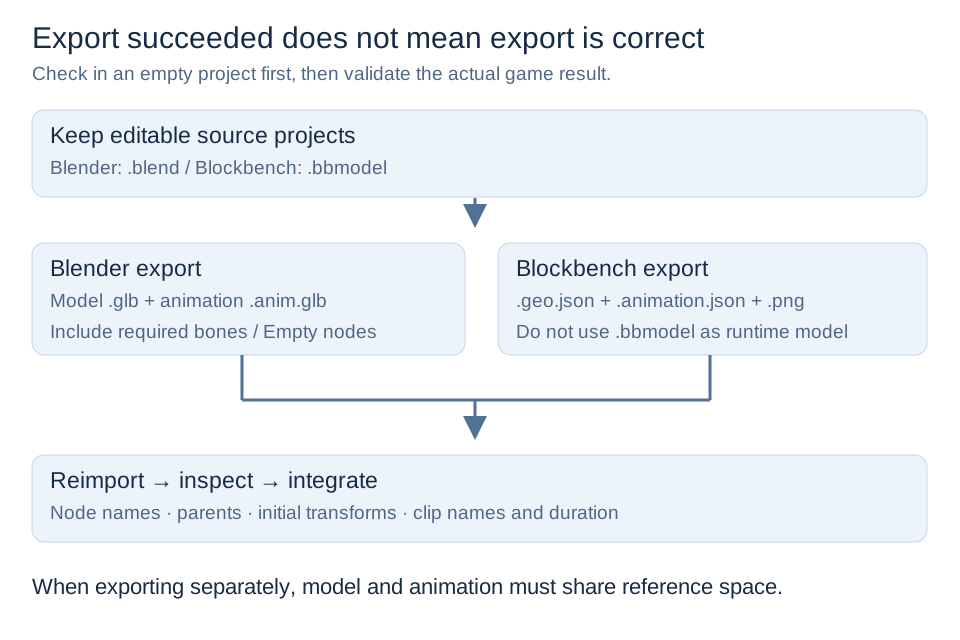
| Export and reimport checks | Distinguish source projects from runtime files. | Open image |
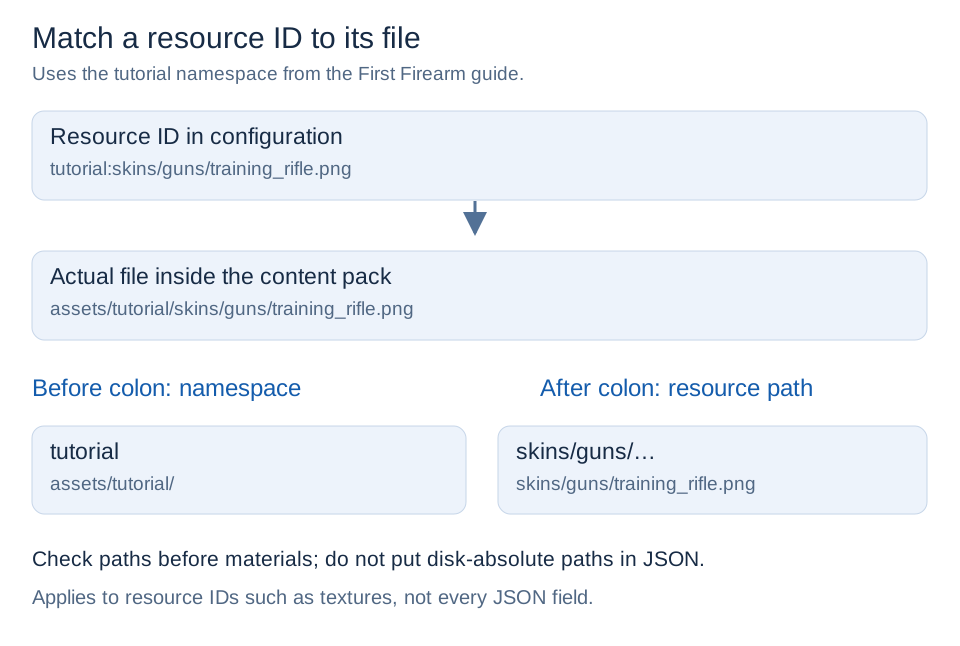
| Resource IDs and real paths | Trace missing resources to their files. | Open image |
Use the diagrams as checkpoints
- Use the route for your application: Blender skinning、Blender Empty or Blockbench。
- Compare hierarchy and anchors, then move each parent to check its children.
- Use the aim-track example for ADS clips, then the ownership table for other actions. Do not apply the ADS exclusions to every animation.
- Reimport the exported files; check nodes, poses, and timing before in-game acceptance.