Blender · Skinning Route
Blender: Armature and skinning
Use this route for detailed meshes and deformation. Rigid weapon parts can have full weight to one bone. The supplied arm template is cube-style: it has no bending elbow or individual finger rig. Skinning as a format capability does not mean this template provides those features.
Software and project
Prepare Blender; the provided arm template was saved with Blender 3.3. Save a separate project and begin with a receiver, magazine, and one moving mechanism.
If needed, download the Arm templates: choose a workflow and download.
Checkpoint: The project reopens correctly and the model/rig ownership is clear.
Model and coordinates
Point the muzzle along model +X. Name moving parts clearly and separate glass or individually hidden parts into their own meshes.
Establish transforms and reference space before animating. Do not apply object or armature transforms independently after animation has been authored.
Checkpoint: Scale, orientation, normals, and assembly are correct, with no duplicate geometry.
Rig, anchors, and weights
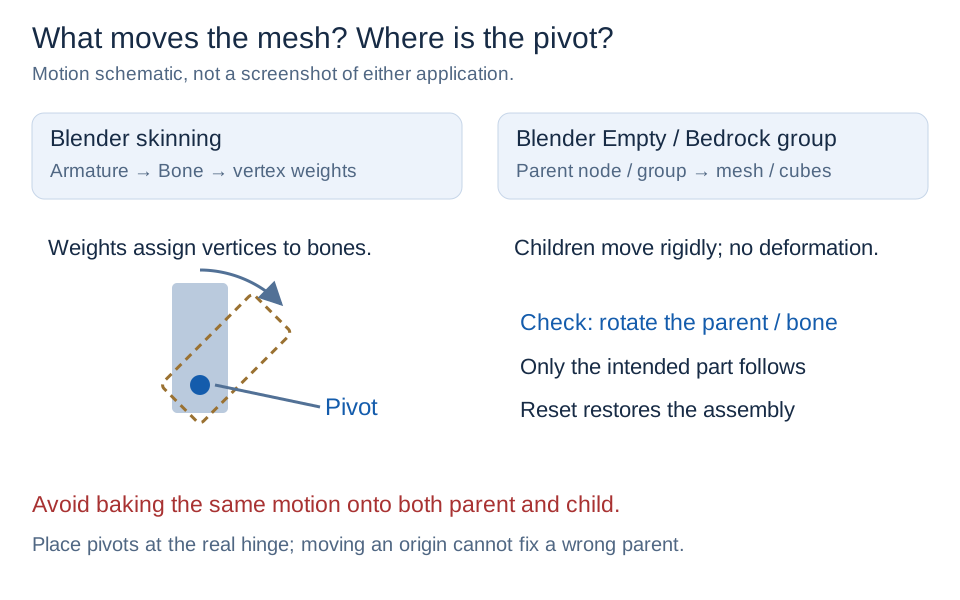
Follow the first-person hierarchy in Model Rules. Here, root is the Armature object, not a bone named root; nodes such as tag_view are bones inside that armature. Do not add an extra root bone to reproduce the diagram. Parent anchors to the appropriate moving branch.
- Give rigid part vertices full weight to their intended bone.
- With the supplied template, check whole-arm motion and grip alignment; do not bind arm meshes to the weapon-body bone. Custom multi-joint arms are advanced work requiring runtime validation.
- Rotate bones individually in Pose Mode and inspect affected meshes.
Checkpoint: The magazine bone moves only its intended parts; arms move as designed for the selected template and anchors follow.
UVs and materials
Unwrap UVs and prepare the base color first. Follow shared material rules for normal, specular, and emission maps.
Blender material-node effects are not automatically converted into GWO material settings.
Checkpoint: Textures remain aligned after reimport.
Animation
Start with idle, raise, and fire; add reload and reload_empty when needed. Keyframe local bone transforms and name every clip.
Read Animation Rules for channel ownership, forbidden tracks, camera tracks, pose layers, and handoff. Do not key every bone in every action.
Checkpoint: Each action plays independently with the intended start/end pose and unique name.
Export and verify
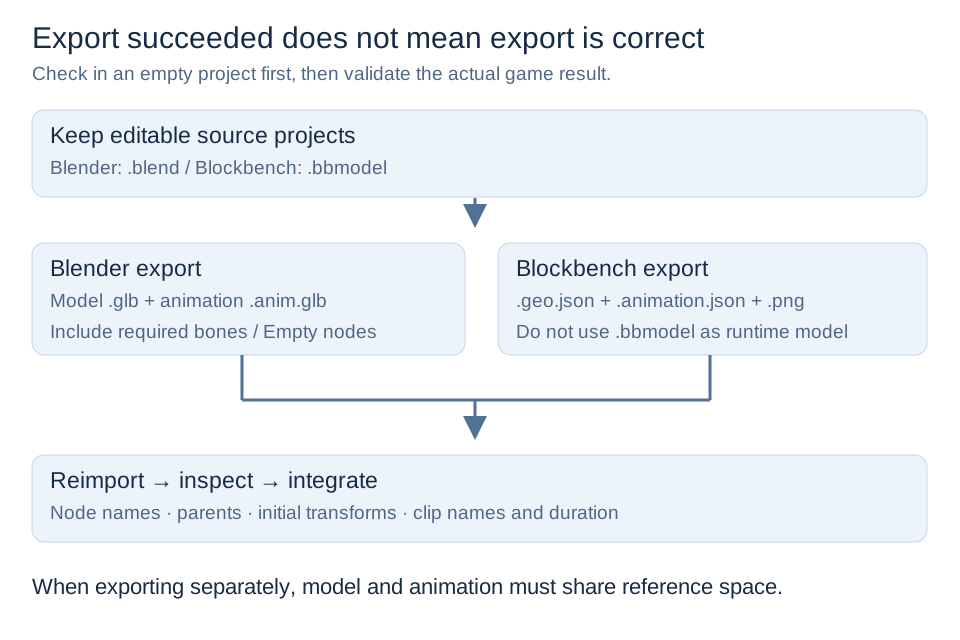
Prefer separate model .glb and animation-library .anim.glb exports. Include the required Armature, meshes, and skinning. Names, hierarchy, and bind pose must agree between files.
Reimport into an empty project and verify clip count, duration, first/last frames, weights, and anchors.
Checkpoint: Reimport matches the source. Continue to Getting Started and shared configuration. You do not need the Empty route.